| Manufacturer: |
AMD |
| Product: |
A8-3870K APU |
| Date: |
Fri, Aug 31, 2012 - 12:00 AM |
| Written By: |
Nathan Kirsch - nate@legitreviews.com |
|
|
The Processor, Motherboard and Memory
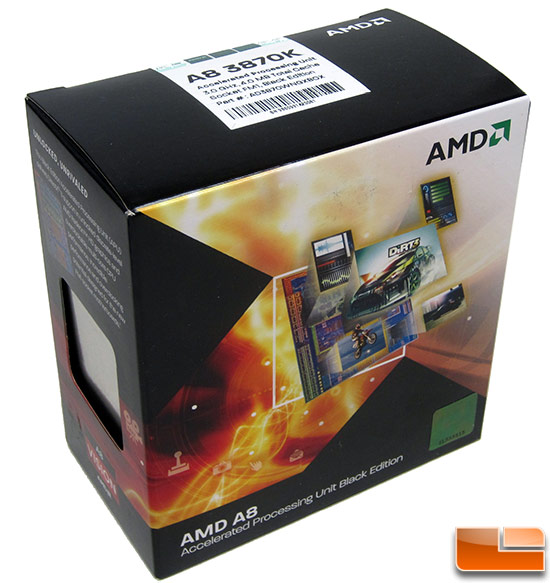
One of the best bangs for your buck these days is an AMD Llano APU.
AMD has been slashing prices on these processors and just last week
slashed the price of the AMD A8-3870K down to just $101. These
Accelerated Processing Units (APUs) are aimed at entry level to
mainstream systems and is perfect to power our mainstream build.
The AMD A8-3870K Black Edition is a quad-core processor that runs at
3.0GHz and has a 100W power rating. The AMD A8-3870K has 4MB L2 cache
and has a Radeon HD 6550D GPU for great 3D graphics performance. This
GPU has 400 Radeon (shader) cores with that run 600MHz. This processor
is also multiplier unlocked, hence the Black Edition name, for easier
overclocking.
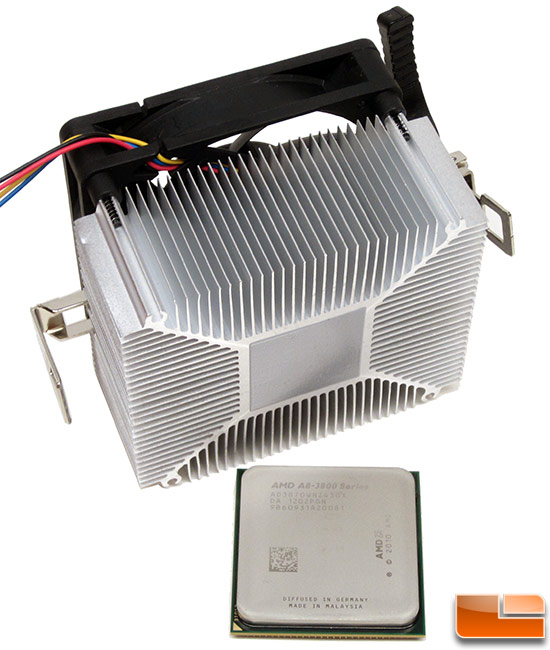
The AMD A8-3870K Black Edition retail boxed processor comes with a
CPU cooler. As you can see from the screen shot above the CPU cooler is
rather small and comes with thermal compound already applied to the base
of the cooler. All you need to do is seat the processor in the socket
and pop on the CPU cooler and secure it with the one lever! Before you
do that you need to have a motherboard!
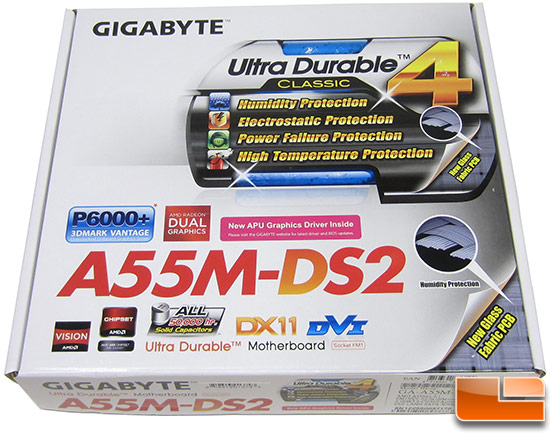
To power this system we went with the Gigabyte A55M-DS2 motherboard.
When this board came out in 2011 it used to be $64.99 plus $8 shipping,
but can now be found for just $49.99 shipped after rebate. We don't
need cutting edge features like USB 3.0 ports or SATA III 6Gbps hard
drive connections, so the AMD A55 chipset and the Gigabyte A55M-DS2 was
perfect for our build.
Just because this is a $50 motherboard don't think you don't get a
ton of nice features. For example this is an Ultra Durable 4 board and
features glass fabric PCB that protects the board from humidity damage.
It also features all solid-state capacitors and comes with a pair of
SATA cables.
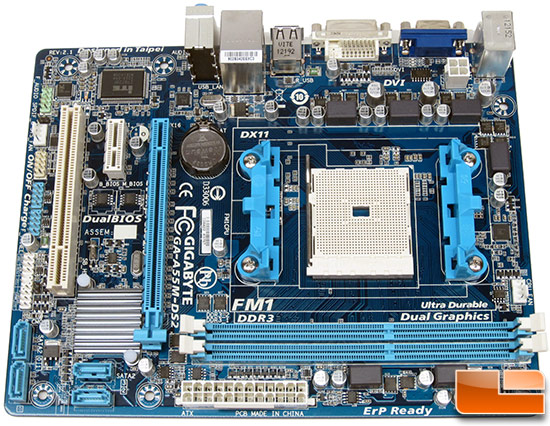
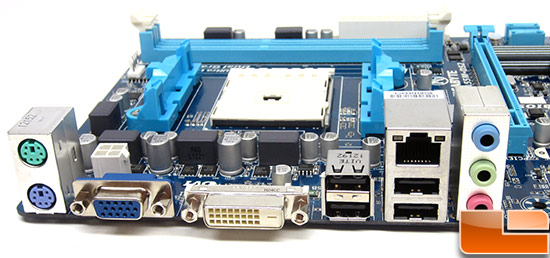
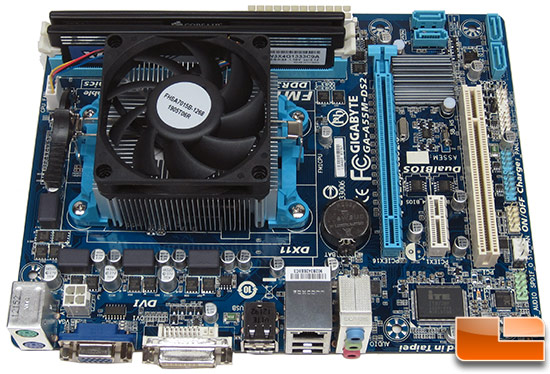
The Gigabyte GA-A55M-DS2 rev 2.1 motherboard is a very small board
that measures in at 225mm x 174mm. A standard mATX board is 244mm x
244mm, so Gigabyte went smaller than the standard here! As you can see
from the photo above you have two DDR3 memory slots, four SATA II ports,
one PCIe x16 slot, a PCIe x1 slot and a old school PCI slot. Along the
left side of the board you have front audio header, another 4pin PWM fan
header, COM header, a pair of USB 2.0 headers, the front panel headers
and 4x SATA 3Gbps.
The rear I/O has two PS2 ports (1x mouse 1x keyboard), D-SUB (VGA),
DVI-D, four USB 2.0 ports, Realtek Gigabit LAN and 3x audio jacks (Line
In/Line Out/Microphone).
When it comes to memory we wanted to spend around $20 and found that
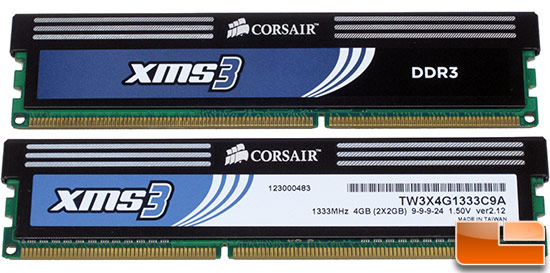
you can get the Corsair XMS3 4GB (2x2GB) TW3X4G1333C9A G kit of memory
for just $21.99 shipped after a $10 rebate. This dual channel memory kit
runs at 1333MHz and features CL9 timings (9-9-9-24) at 1.50V. With a
lifetime warranty and a $22 price tag it is hard to go wrong with a
memory kit like this.
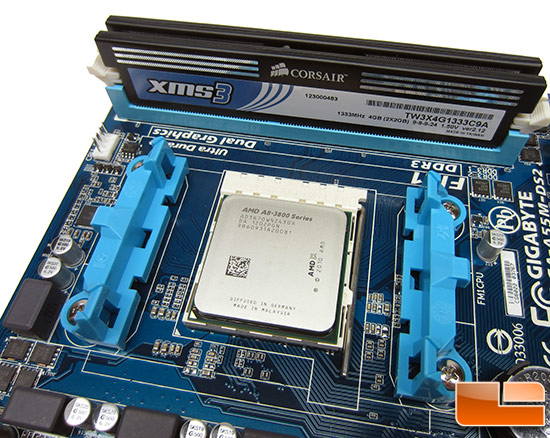
To install the memory and processor you just need to make sure they are lined up so the pins match and secure them in place.
The last step is to align the CPU cooler and to latch that down to
the motherboards CPU socket tabs. Now we are ready to install everything
into the case!
The SSD and Slim ATX Case
For this build we needed to use a slim microATX case, so the Rosewill
R379-M was given the nod to house the components. This case measures
in at 17.0" x 12.8" x 3.9" and is made with thick 0.8mm SGCC Steel.
Inside there are 3 drive bays and 4 low-profile expansion slots. Up top
you'll find a single 80mm 3-pin case fan and down on the front panel
you'll see two USB 2.0 ports along with audio ports.
Inside there is a 300W power supply that acts as a second exhaust
fan. A spring loaded door covers the 3.5" drive slot, and the CD slot
is next to that. The drive cage pulls completely, so if you don't need
it you can simply remove it from the case.
The two parts that we haven't talked about yet for this build are the
SSD and optical drive. We went with the lowest cost SATA DVD burner
that we could find, so not too much to say there. When it comes to the
SSD we did a bit research and found that OCZ had the best deal on a 60GB
SATA II 3Gbps SSD and it was be ideal drive to upgrade the old IDE 80GB
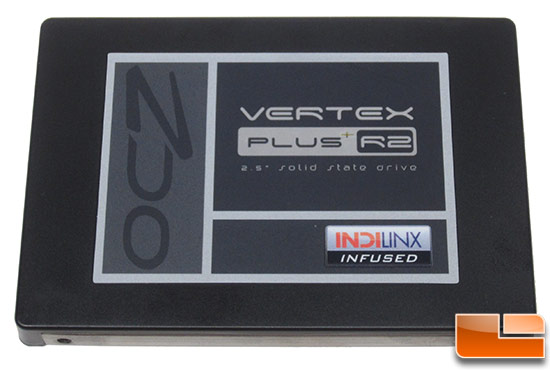
drive in the prior system. The OCZ Vertex Plus R2 uses an Indilinx
controller and has a peak sequential read speed of 180MB/s and a write
speed of 80MB/s. Pretty impressive speeds considering that this SSD runs
just $29.99 shipped after a $20 rebate. At that price you are paying
$0.50 per GB, which is great!

Here is a shot of everything installed and wired up into the Rosewill
R379-M MicroATX case. There was plenty of room for all the wiring and
everything was super simple to assemble. The entire PC took under 15
minutes to build from start to finish and we were not rushing. There was
not a place to mount the SSD, but we were able to use one of the many
holes in the mounting plate and the 2.5" drive was able to be secured.
The eject button for the optical drive wasn't the best and was the
biggest gripe that we had with this chassis.
est Systems, PCMark05, 3DMark06
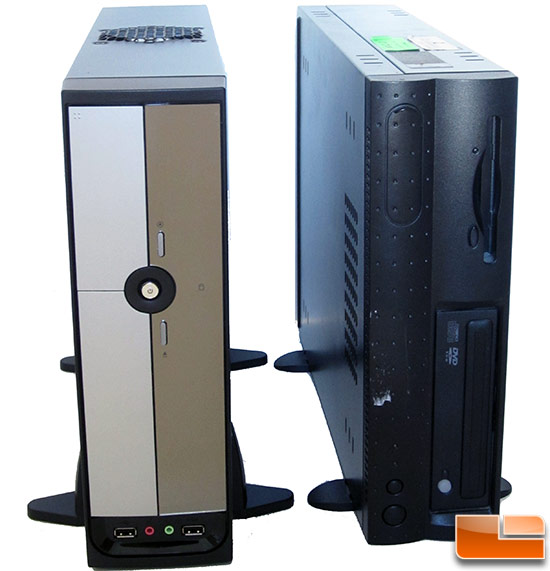
Pictured above are the two systems that we will be comparing the
performance of. On the left is the AMD Llano APU system that we just
built and on the right is a custom built system from 2004.
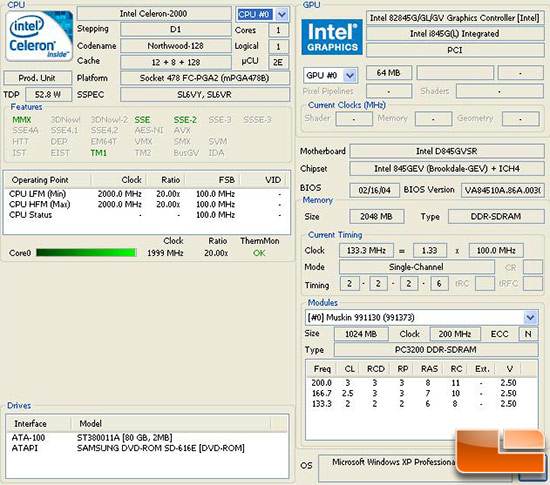
The system from 2004 is running an Intel Celeron single core 2GHz
'Northwood' processor with 2GB of Mushkin DDR 266MHz memory. The
graphics are being handled by the Intel 845G chipset, so we have
integrated graphics. We updated all the drivers on this system and
applied all the updates available for Windows SP3.
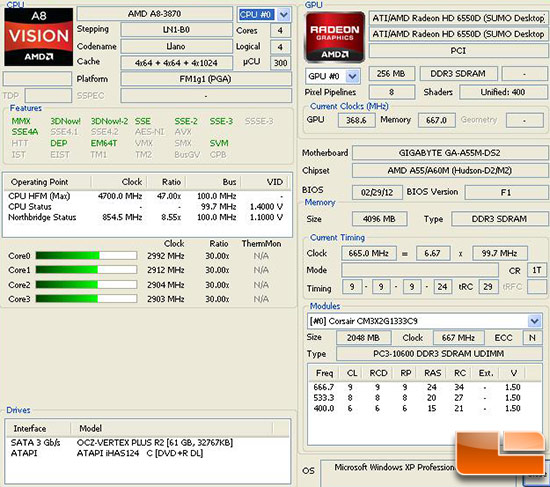
We just showed you all the parts to our sub $300 AMD LLano system, so
we won't cover them again. Everything registered correctly in Hardware
Info (HWiNFO) and can be seen in the image above.
Intel Celeron System From 2004:
AMD Llano System From 2012:
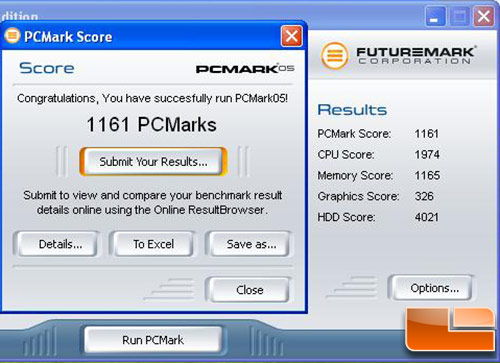
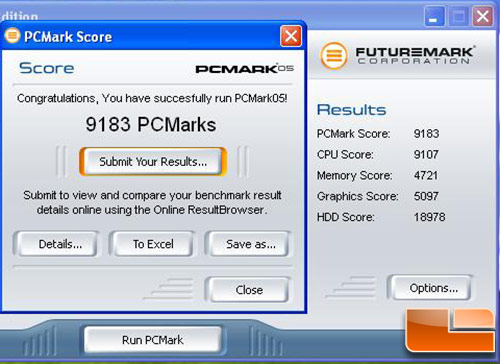
PCMark05 is a great benchmark to use for overall system performance
on Windows XP and we found some big differences between the two
systems. The system from 2004 scored 1161 PCMarks and the AMD Llano
system that we just built today scores 9183 PCMarks. It's a bit ironic
that there are 8 years that separate these two systems and there just
happens to be an 8x performance difference between the two!
If you look at the advanced test details you'll see even bigger
performance differences. For example the AMD Llano system has 15 times
better graphics performance! The HDD score was up nearly 5x, which is
also pretty darn impressive.
Intel Celeron System From 2004:
AMD Llano System From 2012:
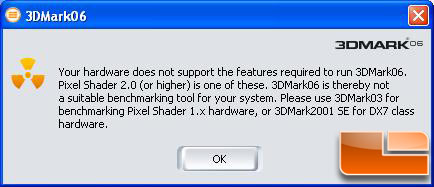
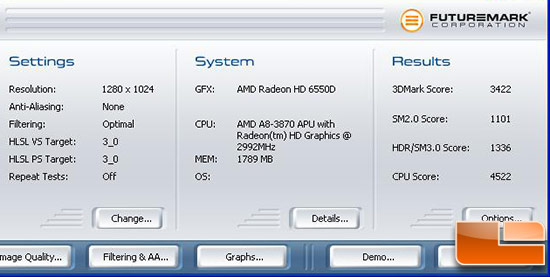
Benchmark Results: The Intel Celeron 2GHz with Intel 845G
graphics was unable to run 3DMark06 since that GPU is unable to support
pixel shader 2.0 applications. The AMD Llano APU packs a full DX11
supporting GPU inside, to is had no problems with 3DMark06 and turned in
an impressive score of 3422 3DMarks. Not bad for integrated graphics!



No comments:
Post a Comment